Hello! I'm Liesl Rowe, a uni friend of Fraser's, hence how I know Bryony. As you've possibly guessed from my name, I'm a quarter-Austrian (although my parents are 'Sound of Music' fans too, before you ask). As a result, I've grown up making various traditional Austrian dishes from our family recipe book with the best definitely being Kaiserschmarrn.
Photography by Zosia Edwards
Literally translated as 'The Emperor's pieces', Kaiserschmarrn apparently came into being after the German Kaiser's chef dropped the pancakes which he was preparing for the Kaiser on the floor and had to quickly make them into something presentable. Makes me feel a whole lot better about my baking disasters...
Technically it's meant to be an Austrian dessert but a few years ago I realised that it would make an awesome breakfast dish as it's basically chopped up pancakes with sultanas. It's one of my favourite things to cook for friends as it sounds really impressive but involves minimal effort.
Method: 1. Put the flour and sugar in a basin. Form a 'well' in the middle of the bowl and slowly add the melted butter, milk and eggs yolks. 2. Beat the egg whites until they resemble stiff peaks, then add along with the sultanas. 3. Pour into a well-buttered frying pan and allow to partially set. Flip the mixture and brown both sides, then tear into pieces. Allow these to continue cooking very gently. When the pieces have finished cooking, both sides should look golden. 4. Serve with oodles of raspberry jam and enjoy!
This year on New Year's Eve life was a bit different. My birthday's on January 1st so usually NYE is birthday party time, but I did NOT want to be 20 and so kept it on the ultra-low this time. Instead Fraser came over on my birthday, and for New Year's Eve Mum's boyfriend came for dinner and Mum and I did uber cooking.
Ingredients: PastryFilling
- 220g plain flour - 9 rounded tbsp golden syrup
- pinch of salt - 3 rounded tbsp treacle
- 1tsp caster sugar - 150g white breadcrumbs
- 160g unsalted butter, chilled and diced - zest of 1 lemon and 1 orange
- 2-3tbsp ice-cold water - juice of half of each the lemon and orange
- 1tsp ground ginger
- 1tsp grated nutmeg
You'll need yourself a 26cm-deep pie dish (or thereabouts), and some cold hands to work with the pastry - though that last one's probably not going to be hard to ensure at the moment (brrrrr)!
What to do: Pastry 1.Sieve the flour, salt and sugar into a bowl, then rub in the butter using the tips of your fingers. 2. Using a round-bladed knife, stir in enough of the water to bind the mixture into a dough. 3. Wrap the dough in clingfilm, and chill in the fridge for at least 20 minutes while you make the filling/pour yourself a glass of wine or suchlike. 4. Roll out the dough on a lightly floured surface into a circle 3cm larger than your dish. If you don't have a rolling pin, use a wine bottle, Genius or what?! 5. Use your rolling pin (/wine bottle) to transfer the pastry to the dish, then press the pastry into the base. Trim off any excess pastry using a sharp knife and put aside. Put the dish into the fridge to chill.
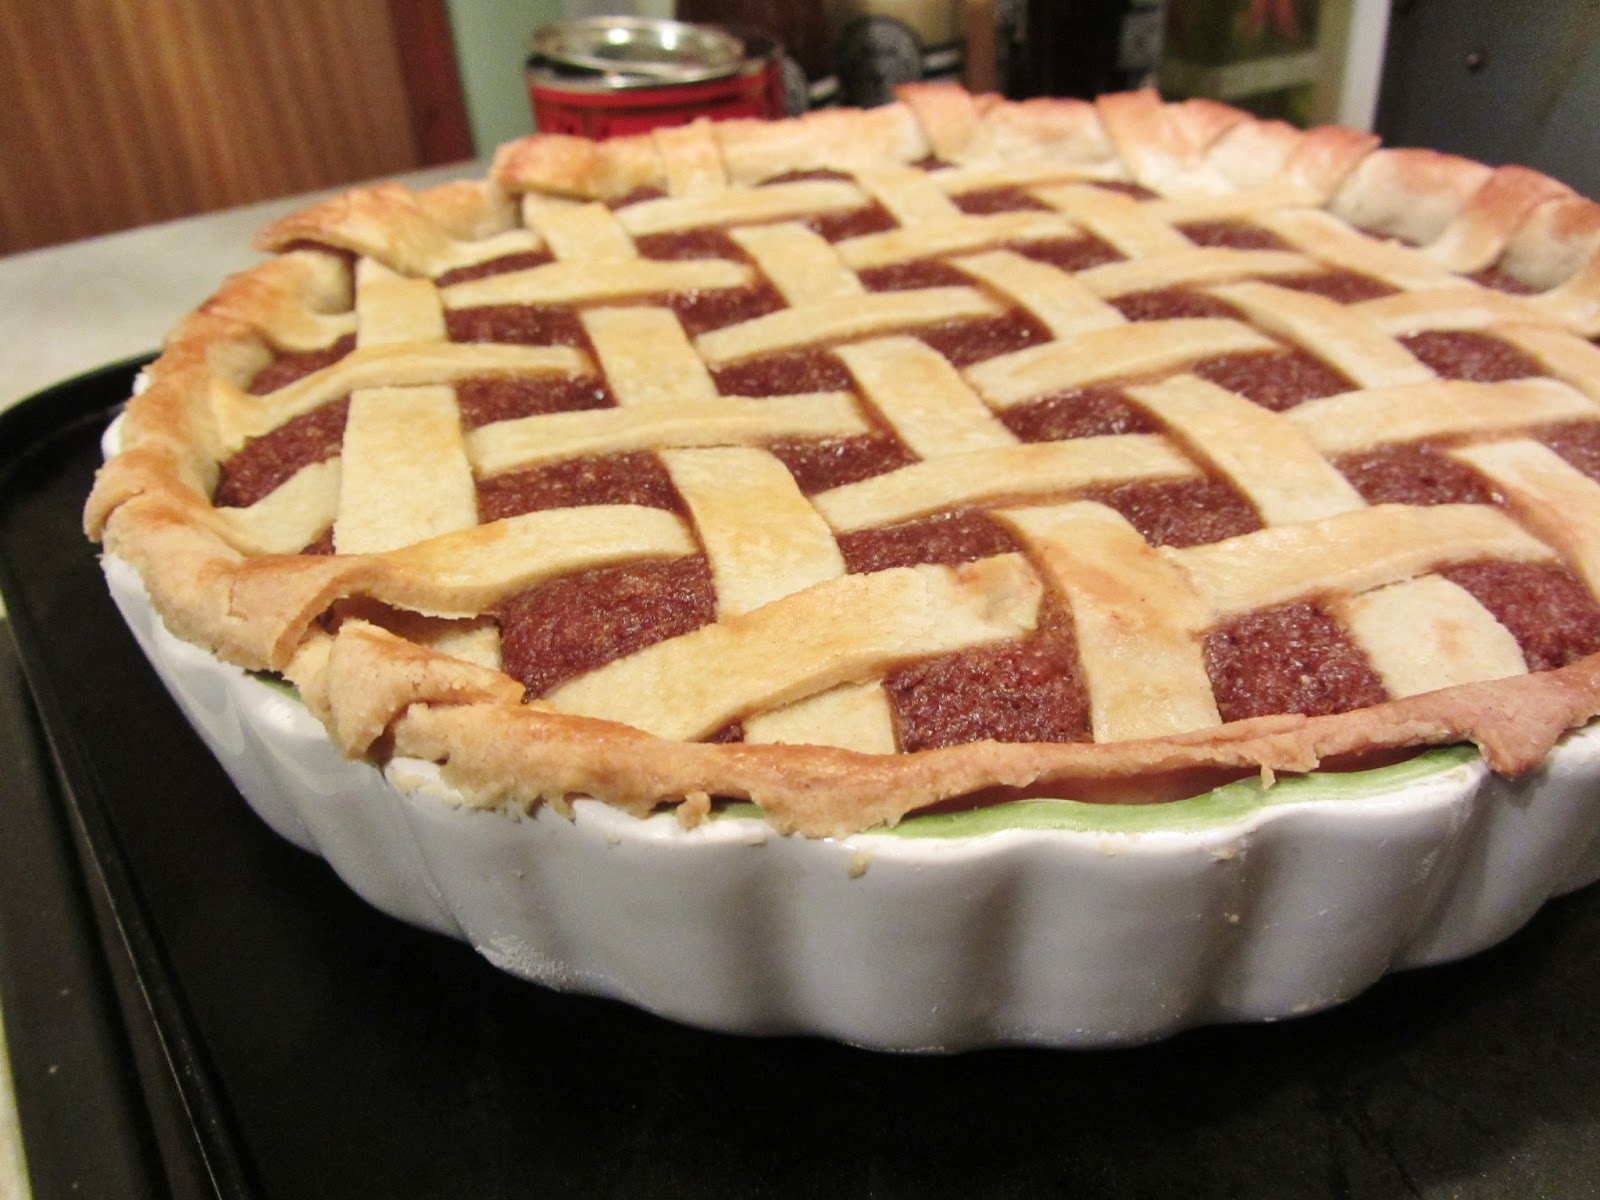
6. You can either clingfilm the excess pastry and fridge it to make jam tarts later, or you can get fancy and use it to make a lattice top. If the former, skip to the filling bit below, but if the latter, keep reading folks. 7. Roll out the excess pastry so it's slightly larger than the pie dish, then cut it into strips of about 2cm each. You should end up with 12-14. 8. Cut a sheet of greaseproof paper larger than the dish, and place one of the strips onto the middle of it. Take another and lay it perpendicular to the first, so it lies across the top. Place another in the same direction as the first strip (leaving a gap the same size as the strip itself), between it and the first, and tucking it underneath the second strip. Continue like this until you have a full lattice and each of the strips are used.
Filling 1. This is super simple. Gently heat the golden syrup and treacle in a pan until runny, then remove from the heat and stir in the breadcrumbs, zest, juice and spices. 2. Leave to stand for 10 minutes. If the mixture seems loose then stir in more crumbs, or if it's too stiff then add more syrup until you're happy with the consistency. 3. Spoon the filling into the pastry case, taking care not to compact the mixture. 4. If you've made a lattice top, slide your hand underneath the greaseproof paper and lift it. Bring it close to the tart, and then flip it in one swift motion. Remove the paper and trim the edges of the lattice, then brush with a beaten egg.
5. Bake for about 30 minutes at 190°C, until the pastry is golden. And then enjoy thoroughly - with cream/custard/ice-cream if convenient. If inconvenient, do it anyway.
When my sister came to visit me last month, she insisted I made sure I had all the ingredients in for her to make butterscotch sauce. She doesn't really cook usually, but she'd made that at home and was keen to recreate.
Of course, we had a fun but hectic time, and the sauce never got made. It seemed a shame to have all the ingredients in and let them go to waste though...
And so a star was born.
For this, you'll need vanilla ice cream, some frozen raspberries, a pan of butterscotch sauce and a few pieces ofhoneycomb. That last one's where the literal bit of the explosion part comes in, 'cos you've got to break the pieces up quite small and you will end up with stray honeycomb on the floor.
The rest of the explosion is in the taste. This pudding is all about texture and contrast - the ice cream cool and smooth, the raspberries sharp, the honeycomb sweet and crunchy and the butterscotch silky and warm, while the citrus note in it from the lemon brings the whole dessert together. You really have to try it.
Plus? The quantity of butterscotch sauce the website gives makes enough for a few servings. So you can either get people over to share it with you or put it in the fridge for next time. I cannot see a downside.
Try it. Your tastebuds will never be the same again.
Late as ever, but here's this month's food column in my university newspaper. Pretty proud of this one - I went home for a few days in reading week and made it for my Mum and her new boyfriend, which should give you an idea of the awesome.
More actual posts to come soon, promise.
It's less saturated in real life, I just wanted it to show up...
I thought she was awesome. She was the only Disney princess who looked anything like me - ie. had shorter, dark hair. I had the dress and hairband and everything. The particular bit I'm thinking of though is this:
Watching it back now, no wonder she has lips red as the rose with that amount of make up on, and my pie totally looks better and also much more hygienic. Guess what this post is really going to be about:
There's something of a growing tradition that for Fraser's birthday I make him 'birthday pie', and so this is this year's attempt. Last year's didn't go so well (completely not my fault) so there was a fair amount of pressure, but I totally pulled it off. Also it's an apple pie, by the way. I probably should have said that sooner. Because even though Snow White made a Gooseberry Pie, "it's apple pies that make the men-folks' mouths water" as her evil stepmother so wisely said. Promise mine isn't poisoned though.
Yes, you could buy pastry, but I love making it and I think it's awesomer if it's your own. Also I make it by hand rather than in a food processor. Definitely not because I still want to be Snow White or because I can't afford a food processor.
1. First of all, I'd suggest putting a small cup of cold water in the freezer while you do other things to make it uber-cold. Then sift the flour, salt and sugar into a bowl. Add the butter and, using the tips of your fingers, rub it into the flour mixture until it looks like breadcrumbs.
2. Using a palette knife (or a butter one which is all I have), stir in enough cold water to bind it all together and make a soft but NOT sticky dough. You can add more flour if necessary, but it's better to just be careful with the water.
3. Being careful to work it as little as possible, wrap the ball of dough in clingfilm and put it in the fridge for at least 20 minutes while you make the filling. This does stuff to the gluten that I don't fully understand but I do know that I've forgotten to do it before and it was bad. So chill your pastry.
For the filling:
- approx 1kg Bramley apples (4 big 'uns)
- 4 tbsp caster sugar
- zest of half a lemon
- squeeze of lemon juice
- 1-2tsp ground cinnamon
- 25g melted butter
- 1-2tbsp water
1. Peel, core and chop the apples and place them in a big bowl of water to which you have added a massive squirt of lemon juice. This will stop them going brown but won't make them taste solely of lemon. This may have been my mistake the first time around.
2. When all the apple is done and you're ready to move on, drain the water (probs easiest to just tip the apples into a sieve and then transfer back) and then add the sugar, zest, cinnamon and butter and stir gently to coat.
3. Get your pastry out the fridge and cut off a third, then roll that out into a circle slightly larger than your pie dish (mine was 22cm in diameter and 3cm deep. IF you don't have a pie dish then you can use the lid of a casserole dish. Or just buy one. They're cheap and exciting.). This will be the base. Then sort of wrap the pastry lightly around the rolling pin, and let it unfurl over the dish. Press all around the bottom and sides to make sure there's no air trapped - you can use your fingers or a spare bit of pastry. Don't trim the edges.
4. Spoon the filling onto the base, and then add the water. Roll out the rest of the pastry into a circle large enough to cover the top, then brush the rim of the base with water and place on the top using the rolling pin method. Gently press together the pastry of the base and the top to seal it, then take a sharp knife and trim the excess pastry. You can use this to make decorations, which stick on with a bit of water.
5. Assuming you don't have any woodland creatures/birds handy to do the job for you, use a fork or your fingers to scallop the rim. Make sure you've cut a couple of slits to act as air holes so your pie doesn't explode, and then brush with a beaten egg.
6. Bake for approximately 35 minutes at 180°C, then when the pastry is all golden and lovely take it out the oven and sprinkle with a bit of caster sugar. Serve with cream, ice cream, creme fraiche, custard... whatever takes your fancy.
I am the new Snow White. No, the animals didn't help me make my pie, but I could totally see them from every single window of the house. And also Fraser whisked me off to Paris a couple of days after I made my pie, which is almost exactly the same as being awoken from your apple-induced-coma and riding off into the sunset.
It's like my very own Disney film.
So this is like, one of the most specialist recipe combinations everrr.
We're talking gluten free gooseberry pie. Because my dad gave me GLUTEN FREE READY MADE PASTRY. Which is a revelation because I'd never seen that before, I love pastry and gluten free flour is, 'scuse my french, a bitch to make into pastry.
Plus my grandma gave me thousands of gooseberries. She grows them and they all decided to turn up at once before a rainstorm so she had to pick them and, stupidly, I said I'd do something with them. Course, they're awkward little fruits, more bitter than sweet and you can't even buy them at Tesco.
SO MANY GOOSEBERRIES OMG.
So Yes. Here's how I did gooseberry pie:
What you need:
200g of ready made pastry
500g of gooseberries
100g of caster sugar
A splash of water
Some egg yolk
And what you gotta do:
1. Preheat the oven to aroun 180 degrees celcius/whatever your pastry packet says.
2. Grease the pie dish with a little butter or oil.
3. Thinly roll out the pastry and place it over the pie dish. Push it down and shape it to the shape of the dish. Trim off the edges and save these to one side to make the lid of the pie.
4. BLIND BAKE IT! This should involve baking beans. I don't have baking beans. I asked the internet. Internet said use rice. I asked the madre. She said use lentils. I used lentils. I spent ten minutes picking lentils out of the cooked pie crust. Don't use lentils.
The cat watching the pie become a pie.
5. As your pie crust cooks, its time to make the filling. place the gooseberries (washed, topped and tailed) in a pan. Add the caster sugar and a splash of water and heat it up. Leave to simmer for about five minutes until the fruit is nice and soft. (I used frozen gooseberries so I cooked mine for a bit longer.)
6. Take your pie crust out of the oven.
7. Strain the gooseberries through a collander to get rid of the water. Place them in the pie crust.
8. Roll out the remaining pastry so it's large enough to cover the pie. COVER THE PIE! Brush the edges of the crust with egg yolk, and put the pie lid over the pie. Squash down the edges with a fork. Poke a few holes in the pie lid and brush it with egg yolk.
9. BAKE THE PIE. For around 25 minutes until its golden brown.
10. Sprinkle with a little caster sugar.
11. EAT THE PIE. Withh ice cream. Or custard. Or cream.Wonderful.