Showing posts with label vegan. Show all posts

Monday, 10 February 2014

Ten Minute Treat: Stir Fry

Much as I love spending hours standing over the stove, gently stirring a risotto, sometimes there just isn't time. This is perfect for a mid-week meal as it's ready to eat in under ten minutes - and is healthy and wonderfully flavoured to boot.


The key to this dish is preparation. None of it takes long to cook at all, so you really do need to make sure you have everything chopped and ready to go before you start to avoid things burning etc.

Ingredients (serves 4):
- 1 red onion
- 2 cloves garlic
- thumb fresh ginger, peeled
- 1 red chilli
- 5 spring onions
- 1 large carrot, peeled
- 1 red pepper
- 100g baby corn
- 100g mangetout
- 160g marinated tofu
- handful beansprouts
- 120g stir fry sauce (pick your flavour - I like the chow mein)
- 2tbsp dark soy sauce
- 1tbsp sesame oil
- juice of ½ a lime
- 300g fine egg noodles (substitute to make vegan/gluten-free)
- sprinkle of sesame seeds

For the mangetout and baby corn I'd recommend just grabbing one of the mixed packs you can get in supermarkets. You can vary the amounts, and can really add any veg you like - mushrooms, water chestnuts or savoy cabbage would all go well - the above is just a list of my favourites/what I had in at the time.

1. Start by putting a pan of water on to boil and thinly slicing all your veg. Put the onion, garlic, ginger, chilli and spring onions together in a bowl to keep them separate from the rest - just because these go in first.
2. Put about 1tbsp olive oil in a wok and heat (think mid to high heat on your hob) - you can test if it's hot by dropping in a slice of veg and seeing if it sizzles. If it does, then go ahead and add the onion mix. Stir this for a minute before adding the carrot, pepper, corn and mangetout and tofu.


3. After another minute add the beansprouts; at this point you should also put your noodles into the pan of boiling water to cook. Make sure you're stirring everything A LOT, or it will just burn.
4. Add the stir fry sauce, soy sauce, sesame oil and lime juice to the wok, along with the drained noodles once cooked (they shouldn't take more than 2 minutes).
5. Serve up and sprinkle with the sesame seeds (and some fresh coriander if you have some to hand). Voila!


Sunday, 20 October 2013

Our Daily Bread

It's said that man cannot live on bread alone; however, we are a house of women.

 
I've always eaten a lot of bread, and loved making it, but I hadn't done much over the last two years because gluten free bread is just so difficult. Now though, I'm back on full-baking-form, and between us Jamie and I are making a loaf of bread every few days. 

It's the easiest thing, and so cheap to make. Seriously - a 1.5kg bag of bread flour costs 80p, the 7g of yeast costs about 4p, and 1½ tsp of salt would be about 0.3p. Which brings the cost of a basic home-made loaf of bread to about 40.3p!

The thing that puts a lot of people off making bread is the time needed to make it, but that's one of the reasons I love it. Spend 15 minutes on the initial mixing and kneading, then go to campus for a few hours of lectures. By the time you get back you'll have a beautifully risen dough with minimal amounts of effort! 
So give it a go.

Basic White Loaf - Ingredients:
- 675g strong white bread flour
- 7g yeast
- 1½tsp salt
- 450ml warm water

Method:
1. Mix the dry ingredients together in a large bowl, then make a well in the centre and pour in the water.
2. Using your hands, mix everything together until you get a dough. If it's too dry you can add a little more water, but if it's on the wet side try your best to work with it rather than adding flour as a wet dough often leads to a better loaf.
3. Sprinkle your worktop with flour, then turn out your dough and knead for 10-15 minutes, until it's silky smooth and elastickey. If you're not sure about your kneading technique I recommend youtube - there are thousands of videos with instructions and demonstrations.
4. Put your dough back in the original bowl and cover with cling film, then leave it alone. It needs at least an hour and a half to prove, but it can really be left for as long as you need it to be.

Before and after proving
5. Tip out the risen dough and knead for a couple more minutes, then shape and place on a greased baking tray. Cover with cling film and leave for another hour or so.
6. Heat your oven to 230°C. Take off the cling film and, using a sharp knife, cut a few slashes diagonally along the top of the dough (you can also dust it with a little bit of flour at this point to achieve a more rustic look), then stick it in the oven.
7. After 15 minutes, turn the oven temperature down to 200°C, then bake for a further 20-25 minutes (the initial blast of heat will give you a better crust).
8. Remove your beautiful creation from the oven and transfer to a wire rack if you have one, or just a likely chopping board if you don't. You should leave it for at least 15 minutes before attacking it with mounds of butter, though in our house we can never wait that long.


Tuesday, 3 September 2013

A Souperior Use for Tomatoes

Life is a bit mad, which is why posting has been a bit sporadic recently. I've been stalking the legend that is Nigel Slater during his visit to my tiny Cumbrian town, and interviewing the lovely Ruby Tandoh from The Great British Bake Off for The London Student. Also, I felt I should blog something savoury, which meant actually cooking something savoury and not just spending my days baking and eating cake.

Last week, Mum came home with LOADS of tomatoes from her friend at work, and they needed to be used. And so, my sister and I made tomato soup. And it was really good.

Ingredients (serves 4):
- 1.5kg tomatoes, roughly chopped
- 1 large red onion (or two small), roughly chopped
- half a red pepper, roughly chopped
- 2 cloves garlic, peeled and roughly chopped
- 1 litre vegetable stock
- large bunch basil leaves, torn

Method:
1. Put the tomatoes, onion, pepper and garlic into a large roasting dish. Drizzle with olive oil and add some salt and pepper and about a third of the basil leaves, then cook for 40-50 mins at 220°C, stirring every 15 minutes.


2. Tip the vegetables into a large saucepan, then pour in the vegetable stock and bring everything to a gentle boil. Add the rest of the basil leaves and simmer for 5 minutes, then take off the heat and blitz until smooth.
3. Season to taste, then serve with lots of bread. Easiest meal ever.


Thursday, 8 August 2013

An Indian Feast


Before the end of term I decided I wanted to do a proper big dinner for a few of us, because I like cooking and I like people. Zosia had an 'Indian dip selection' in the fridge. That was that, really.

Sooooo I made a mixed bean curry and onion bhajis and chapatis and coriander rice. And it was exhausting. And also wonderful. The curry recipe belongs to a friend of my aunt and has been a favourite at home for years - it went down pretty well here, too! It's a long list of ingredients but don't be daunted: most of them are just store-cupboard spices. Also, because it needs time to marinade it's a good one to make earlier in the day.

Ingredients (serves 4):
- 1tbsp mustard seeds
- 1tbsp cumin seeds
- 1 small onion, finely chopped
- 1 clove garlic, finely chopped
- 2 chillis, chopped
- 1 tin chopped tomatoes
-  ½tsp turmeric
- 1tbsp ground coriander
- 1tbsp ground cumin
- ½pt boiling water
- 4 large tins of beans (I tend to use 2 of chickpeas and 2 of kidney beans)
- 3 balls of frozen spinach
- handful fresh coriander

Method:
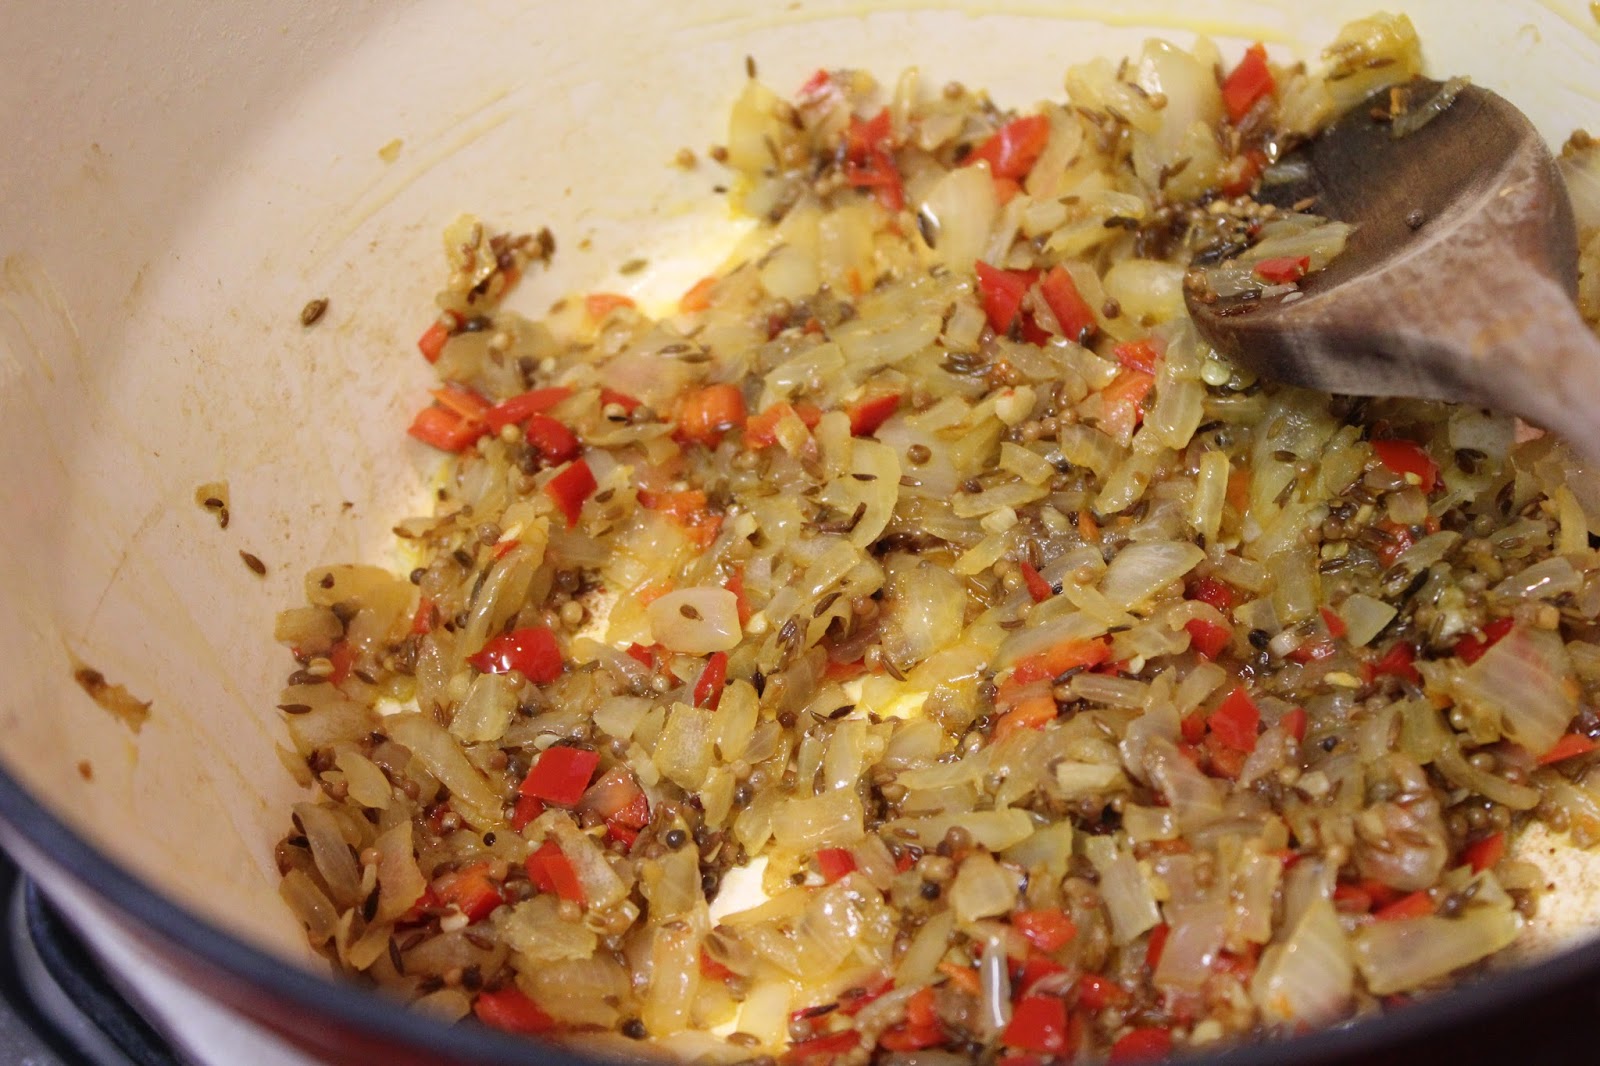
1. Grab your biggest saucepan and drizzle in some olive oil. Add the cumin and mustard seeds and heat until they start popping.
2. Add the onion, garlic and chilli and soften 'til the onion becomes clear (about 8 minutes).


3. Add the chopped tomatoes and spices and cook for a few more minutes, then add the water.
4. Stir well, then put on a lid (or some tin foil) and simmer on a low heat for 30-40 minutes.
5. Add the beans and spinach and stir until the spinach has de-frosted, then allow to cool and marinade for as long as you have time for.
6. Cook through when required, then season and add the fresh coriander.


Simple. For the rice, I cooked some basic brown rice and then added a squeeze of lime juice, some salt and pepper and some fresh coriander to liven it up a bit.

The onion bhajis I made were a very yummy side, and seemed to work fine with gluten free flour.

And it's easy to make chapatis. You need a tablespoon of both wholemeal and white flour per person (OR you can buy chapati flour and use 2tbsp per person. All the flour in our house at uni is gluten free, so it was actually cheaper for me to do this). Add a drizzle of olive oil and enough warm water to bring it all together in a dough, then knead for a couple of minutes. Cover with clingfilm, and then leave for an hour. 

Divide the dough into pieces (4 each, so it depends how many you're making for): they'll look small, but it's all good. Roll out as thin as you can without breaking them, then grab a frying pan and and cook the chapatis one at a time, for about a minute each side (you don't need any oil). Once cooked, transfer to a plate and spread with butter, then onto the next!

Serve up to your hungry friends and enjoy your feast.


Wednesday, 22 May 2013

Spanish Bean Stew

Or 'Spanish Bean Cassoulet', if you're trying to feed someone fussy (*COUGH* Shannon, *COUGH* Alex) who gets put off when they hear 'stew'. The recipe belongs to my Mum's friend Christine, so I'm hoping I've done it justice and that my alterations aren't frowned upon too much! It's super cheap to make and the flavours are like nothing else I've ever had, and oh lordy the smell.


Ingredients:
- 3 shallots
- 2 cloves garlic
- 3 peppers (not red)
- 2 sticks celery
- 10 new potatoes, washed
- 3 large tomatoes, chopped
- 400g tin green lentils
- 400g tin chickpeas
- 400g tin borlotti beans
- 2tbsp smoked paprika
- 1tbsp sweet chilli sauce
- water to cover
- 1 glass red wine
- 100g curly parsley

The celery is Mum's addition, and the wine is mine. Not just because I'm a student and that's what we do... I think it gives it an extra depth of flavour and helps everything else to come alive. Also, in terms of the beans, you can pretty much use what you like - this time I had cannelini beans instead of borlotti, and they were brill. ALL OF THE BEANS.

Method:
1. Roughly chop the shallots, garlic and celery into small-ish pieces (you're not going to blend it at the end like a soup, so however big you chop everything is pretty much the size they'll be at the end) and throw into a large pan with some olive oil.
2. Cook on a low heat while you chop the peppers, potatoes and tomatoes, and then add those too. Cook for a further 10 minutes or so, until everything's softened.


3. Stir in the beans and lentils, then add the smoked paprika and sweet chilli sauce. Pour in the wine and enough water to cover everything, then bring to a low boil. Cover (use tinfoil if you don't have a lid) and simmer for about an hour and a half, stirring every 20 minutes or so (I usually take the lid off for the last 20 minutes, too).
4. Once it's nicely reduced and you just can't stand the smell any longer, chop up the parsley and add to the pan along with some salt and pepper. Serve with lots of bread and butter.
NB: You can freeze any leftovers, though it does make it go slightly mushy. Still good though!


Wednesday, 15 May 2013

Revision Food

This last week has been crazy - even more so than normal. Zosia and I have both had exams, and there's also been a load of elections (I'm now the Vice President for Media Society and the Lifestyle Editor for our uni newspaper The Orbital. Woo!), and I LOST A HUGE WAD OF MY NOTES. Literally: everything I've written from the end of January up to the end of the Spring term. So all together it's been very stressy and just a little bit frantic.

CUE COOKING.

A few weeks ago I picked up the Sainsbury's magazine (totally not because it had Nigel Slater, Mary Berry and Jamie Oliver all on the front cover) and discovered the wonder that it is. And inside they had a lovely recipe for a carrot and tarragon soup with hazelnuts that I really wanted to try - though of course, being me, I couldn't just follow a recipe. So here's my version:


Ingredients:
- 50g butter
- 1 onion, chopped
- 2 cloves garlic, chopped
- 2 sticks celery, chopped
- 1kg carrots
- 1 eating apple, peeled, cored and chopped
- 1.2L veg stock
- 100g blanched hazelnuts
- 1tbsp chopped tarragon (plus extra for garnish)
- olive oil, to drizzle

Method:
1. Preheat the oven to 180°C. Melt the butter in a stock pot/really big pan and stir in the onion, garlic and celery. Cook for about 10 minutes. In the mean time, toast the hazelnuts in the oven for 8-10 mins or until golden.
2. Stir in the carrots, and cook for a further 10 minutes, then throw in the apple, tarragon, vegetable stock and some seasoning and bring to a boil. Simmer, partly covered (if you don't have a lid grab some tin foil), for 30-40 minutes.
3. Leave to cool for 5 mins or so, then blend. Ladle into bowls then drizzle over a swirl of olive oil before chopping up your hazelnuts and the rest of the tarragon and adding those too. Voila! Simple.


Tuesday, 30 April 2013

Alive and Cooking Ratatouille Pasta

So I'm still alive. Promise. And I'm still cooking, just about... 

For those newcomers to the blog, HI I'M ZOSIA. I'm the other half of the "we" that Bryony's always talking about when she talks about our blog, and this year I've been ridiculously busy. University work and students' union commitments have taken up all my time, which has meant that I haven't been able to cook anything more ambitious than tomato pasta sauce and a few risottos here and there. Being completely honest the majority of my eating has been done in the library. I'm THAT girl...

Eating one of Bryony's cupcakes in the library
But Bryony's been bugging me to blog. For a long time. A reaaaalllyyy loooooong time. Thing is though, when I do have time to cook, I don't have time to even take photographs, let alone write up a blog post afterwards... 

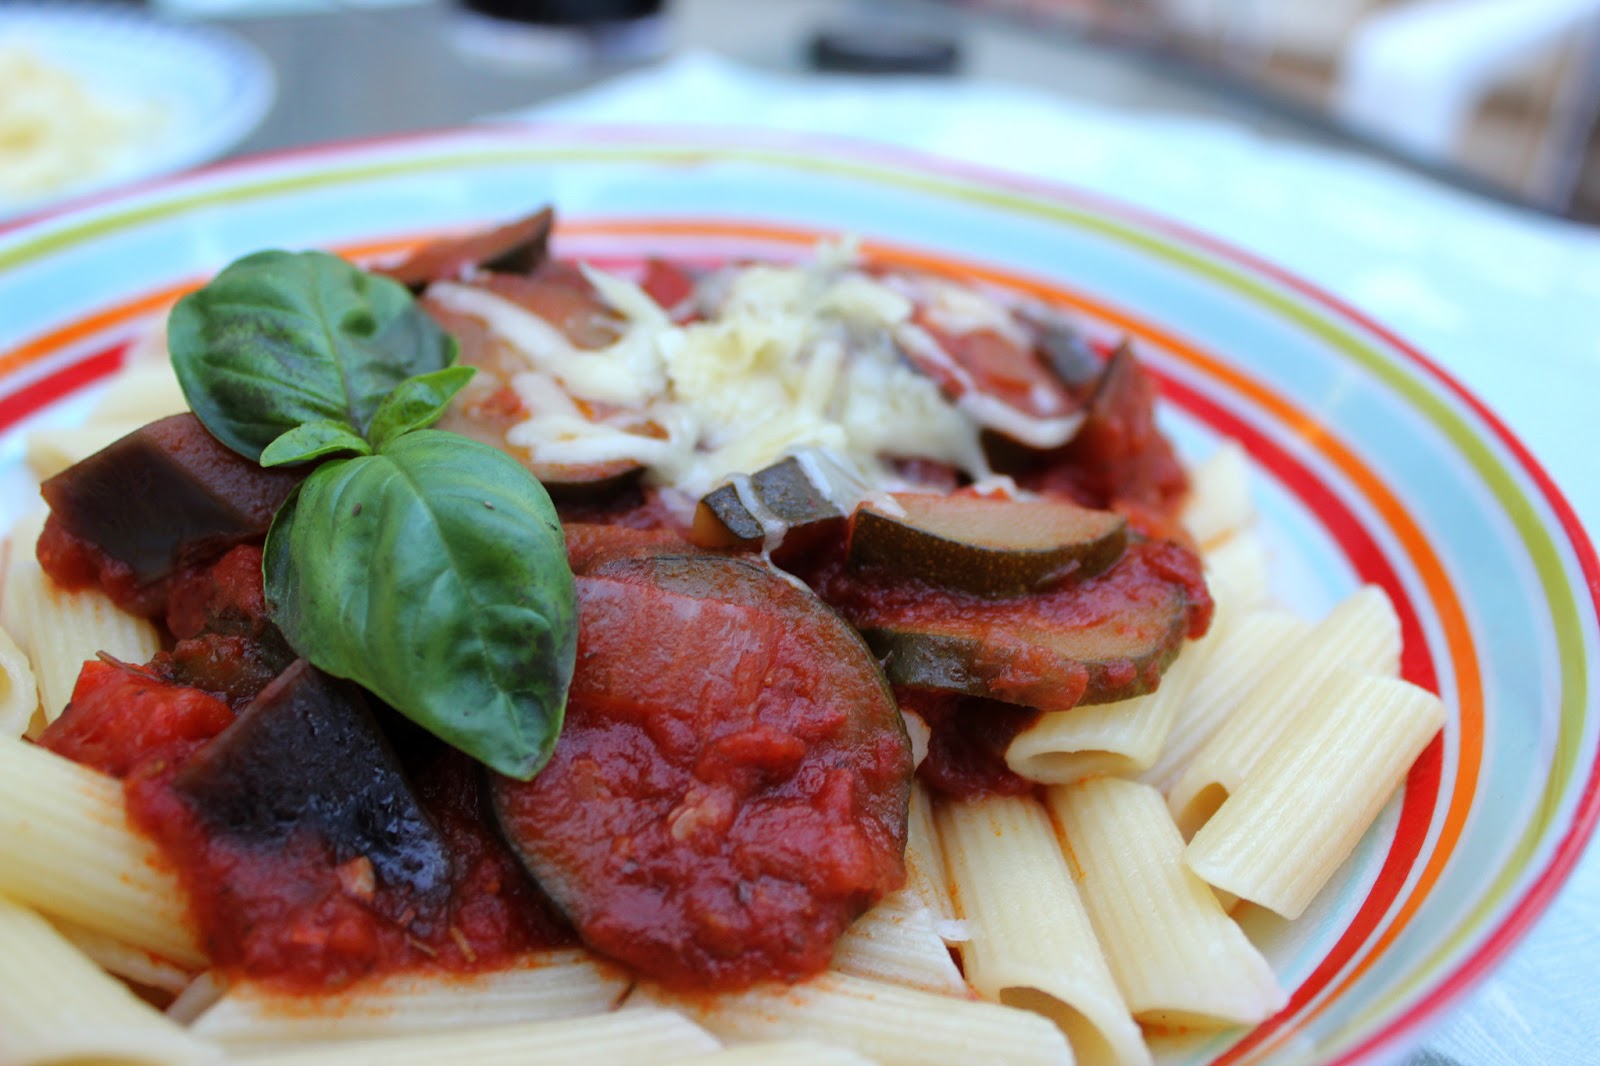
But now it's exam term, so I have time to think for once. Which means I've actually got time to de-stress by cooking. I was sat there in the library today thinking about cooking, and I went to the weekly fruit and veg market at the SU and bought all sorts of vegetables, and after I came home from my eight hour library session I made Ratatouille Pasta Sauce.


Serves three people, plus enough for lunch the next day, plus some for the freezer... Possibly about six people...

For the sauce:
1 Large Onion
2 Cloves of Garlic
Splash of Olive Oil and a Knob of Butter
3  Courgettes
1 Medium Aubergine
1/2 a Large Red Pepper
3 Tins of Chopped Tomatoes
Red wine (I half filled one of the tins with wine, topped it up with water and added this)
2 Teaspoons of Chilli and Tomato Pesto (or just use red pesto with a dash of chilli powder instead)
1 Teaspoon of Herbs de Provence
1 Teaspoon of Italian mixed herbs
1 Oxo cube
Salt and Pepper to taste
Generic Chopped Fresh Herbs (I used some basil and some parsley, but use what you've got. Rosemary would work)
Grated Cheese to Serve.

Plus pasta, however much you fancy.

Here's what you do:
1.  Melt the butter in a pan with a splash of oil. Chop the onion nice and small. Chop the garlic too, then add this all to the butter and oil. Let it simmer for five to ten minutes while you're chopping the rest of your vegetables.
2. Chop your courgettes into round slices and add to the pan. Stir it all around and let it simmer for a few minutes while you chop your aubergine.
3. Add the chopped tomatoes to the pan, along with the wine and water. Mix in the aubergine, the herbs, the oxo cube and the chilli and tomato pesto.
4. Make sure everything is combined well, put a lid on the pan and let it all simmer for ten to fifteen minutes.
5. After ten minutes or so, put your pasta on. Season your ratatouille sauce with salt and peper, and about five minutes before the pasta is done, stir in the chopped fresh herbs.
6. Serve your sauce over your pasta, with some more basil and plenty of cheese. Unless your name is Harry. In which case you don't eat cheese. Because you're quite frankly a bit weird.


We served three people (Harry, Bryony and Me), and I had enough for tomorrow's lunch, plus a sizeable amount to put in the freezer.

Dinner with Hazzaaa
(Dear Bryony: I COOKED. I BLOGGED. Are you happy now?)

Thursday, 21 March 2013

Vegetable Chilli (the best you've ever tasted)

This chilli is so easy to make that it's really impossible to get it wrong - it just takes a bit of time. It feeds a whole bunch of people (about 6) so is great if you're having friends round, plus it freezes brilliantly. It's also packed with the things your parents always ask if you're eating enough of, like BEANS (look, Mum!), and what’s more, you can adapt it to whatever you fancy or just happen to have in the fridge - use different kinds beans or vegetables, or play around with the spices to vary it.

 
Because of the awesomeness I ended up making it two days in a row last week - first to feed my friends before a night out, and the second time because Fraser requested it when he came to stay. I'd made double quantity the first night (there were 9 of us) but my hopes of leftovers were in vain!

Ingredients: 
- 1 onion
- 2 peppers (yellow and red)
- 2 sticks celery
- 1 large carrot
- 2 cloves garlic
- 2 chillies (red and green)
- 300g Quorn mince
- 1tsp chilli powder
- 1½tsp ground cumin
- 1tsp ground coriander
- 2tsp cinnamon 
- 1tsp paprika
- 1 glass red wine
- 2x 400g tin chopped tomatoes
- 2x 400g tin kidney beans (or any you like)
- 200ml vegetable stock
- 1 bay leaf
- 30g fresh coriander

Method:
1. Heat some olive oil in a large pan or wok. Roughly chop the onion, peppers, celery, carrot, garlic and chillies and add to said pan, then cook for about 10 minutes, until softened and beginning to colour.


2. Add the Quorn mince (straight from frozen, but bash it a bit to break it up first) and cook for a few minutes until it's browned, then add the spices and cook for a further 5 minutes. This is the only point where you really have to watch it, or the spices will stick to the bottom of the pan and burn.


3. Stir in the tomatoes, red wine, bay leaf, vegetable stock and beans (drained), then give it a good stir to mix it all together. Bring it to a boil, then let it simmer for about an hour, stirring every 10 minutes or so to make sure it isn't sticking.


4. Turn off the heat, then roughly chop the coriander and add it to the pan, along with salt and pepper to taste. You can serve it with basically anything - my favourite is in tortilla wraps with sour cream and a strong cheddar, but you could do it with rice and add chopped spring onions, or even just eat it by itself. The choice is yours! But do eat it - you're missing out until you do.


Monday, 21 January 2013

A Post-Snow Warm Up

As is the case for most of the country at the moment, over here we're covered with a blanket of beautiful snow. There have been snowball fights, snow angels and even a snow rabbit, and at the end of the day you need something warm and comforting to come back to - that preferably doesn't require a lot of effort. Enter bread and stew.

I always think of stew as being a bit bland and mushy, and generally not the most appealing. I don't know why because I've never really had it, but this blows the generic 'stew' idea out of the water. It's a take on one by Nigel Slater, and is full of spices and textures and goodness. And as for bread, I've adapted a family recipe to make gluten-free bread rolls. So. Much. Good.


Stew - mine's basically the same as Nigel Slater's recipe, but a vegetarian version with a few extra bits
Ingredients:
- 4 medium onions
- 3 small carrots
- 1 large stick celery
- 1 clove garlic
- ½ tsp mild paprika (you could also use smoked)
- ½ tsp cinnamon
- ½ nutmeg, grated
- 300g Puy lentils (green work fine as a substitute)
- 500ml veg stock
- large handful fresh parsley
- 1tsp sugar
- couple of knobs of butter
- crème fraîche (to serve)

1. Melt a knob of butter in a large pot or saucepan. Roughly chop two of the onions, along with the celery, carrots and garlic, and add to the pan. Cover and let steam for a few minutes, before adding the spices. Stir to coat and cook for a few more minutes. 
2. Add the lentils, stock and 500ml of water. Cover and leave for 30 minutes - stirring occasionally - until the lentils are all soft and nice. 
3. While that's cooking, stick another knob of butter in a small pan. Chop the two remaining onions into fairly large pieces, then add along with the sugar. Allow these to cook slowly and caramelise, and then finish with a grate of nutmeg. 
4. Add your handful of chopped parsley to the lentils along with some salt and pepper, then serve with the onions and a dollop of crème fraîche.


Gluten-free bread rolls - my Mum calls these 'milk rolls' for reasons which will soon become apparent. The gluten-free version makes 8-10 rolls, but you tend to get more out of the regular version.
Ingredients:
- 300ml milk
- 50g butter
- 7g sachet dried yeast
- 1tsp caster sugar
- 500g gluten-free plain flour
- 1tsp salt
- 1 small egg, beaten

1. Place the milk and butter in a pan and heat until lukewarm.
2. Sieve the dey ingredients into a bowl and mix together. Make a well in the centre and pour in the liquid along with the egg. Mix to a soft dough, then spend a few minutes attempting to knead some air in. If you're making the regular gluten version knead well until smooth and elastic.
3. Cover with a damp cloth and leave to rise in a warm place for 30 mins, until increased in size.
4. Turn onto a well-floured surface and have another attempt at kneading for a few minutes. Cut into pieces and shape into rolls.
5. Place on a greased baking sheet, cover and leave in a warm place for another 10-15 minutes. Grab another egg and beat it with a splash of milk, then use this to glaze the rolls. Sprinkle with various seeds to make them all pretty, then bake in a preheated oven at 220°C for 20 minutes.

Voila. I know the snow is causing a lot of disruption and all, but I kind of hope it stays a bit longer. 
Days like these are the best.


Wednesday, 31 October 2012

Life is a crazy place

Okay. So you may have noticed that neither me or Zosia have been doing as much with this blog as we did last year. As way of explanation/excuse, let me just say that this is basically life at the moment...

By which I mean, life is freaking crazy.

 As well as, y'know, degrees and reading and housekeeping and everything else that means the partying that picture shows is becoming a scarily infrequent thing. 

The other part of my excuse is that this is no longer my only food-writing outlet. Because since September I've had a column in my university's newspaper, The Orbital. So if you're at Royal Holloway then go get a copy. And if you're not, then here's this month's column. Purely because I want to share the foody love with you all, and not because I'm showing off (okay, only slightly because I'm showing off).


Sunday, 12 August 2012

What to do when you win a coconut

First of all, I'm sorry for being a bit MIA recently. Life is mad, especially since I got a job at my local fruit and veg shop (yay vegetables), but I will make it up to you. Starting with this.

Because at the Royal Holloway Summer Ball this year, I won a coconut on the coconut shy. Here is a picture of me with my coconut.

Zosia would like to add here that she really reallllly was very very excited.

I named him Tarzan. I was very very excited and full of ideas of what to do with it... but a month later it was still sitting on my shelf, though at home now as we'd left uni. And then my sister suggested I used it to make some sort of Thai curry. AN IDEA WAS BORN. And my coconut became this:


Which was pretty darn good really.

What you need for a Bryony-style Thai green curry:
- 1 coconut
- 8 spring onions
- 2 cloves garlic
- half a red pepper
- half an aubergine (a whole one would be fine)
- a thumb-size piece of ginger
- 2 chillies (I used 1 red and 1 green, but it's up to you)
- 6-8 new potatoes
- handful green beans
- handful mange tout
- 1 1/2 tsp soya sauce
- 1 tbsp soft dark brown sugar
- 350ml water with half a knorr stock pot or 1 oxo cube
- zest and juice of 1 lime
- fresh coriander
- jasmine or sticky rice, to serve

And the SECRET ingredient (less secret now I put it on the internet in capital letters) is a 'Thai Taste: Easy Thai Green Curry Kit'. Which sounds like a massive cheat, but actually it isn't and is also the best money-saver ever. It includes coconut milk, Thai green curry paste and herbs - which, if you bought them seperately, would come to about £5-6, and I think this was £2ish. So no complaints.

It's quite a lot of ingredients, but I promise nothing is lost and it's totally worth it. This amount served three, but it would be a good one for bulking up and cooking en-masse, too - especially if you get people to pitch in for cost.

1. Start by getting into your coconut. We used a hammer and chisel, but the internet is full of suggestions. Once you're in, cut the fleshy bits into small, thin pieces and dry-fry them in a wok or frying pan until they're toasted. This alone is amazingly nice. Put the coconut water aside, and put the toasted coconut pieces in a bowl to cool down. Meanwhile, put your new potatoes on to boil for about 15 minutes.


2. In the now-empty wok heat up some oil, and then add the spring onions, garlic and ginger. Stir-fry these for a couple of minutes, and then add the aubergine, followed shortly by the green beans.

3. Once the vegetables are starting to colour and the aubergine is beginning to shrink, add the pepper, chillis and Thai herbs. Stir-fry all this for another 5 minutes or so, before adding in the boiled new potatoes (chopped), the curry paste and most of the toasted coconut. Cook for another few minutes.

4. Next, add the mange tout, the coconut water (the stuff that was inside your coconut), the coconut milk, the water and the stock pot/cube. It should be beginning to look more like a curry. Turn up the heat slightly and stir, and add in the sugar and soya sauce. Now is also a good time to put your rice on to cook, though it depends what sort of rice you're using.

5. After 15 minutes or so, your liquid should have reduced by about half, and should now be thicker and more sauce-like (although it isn't a particularly thick sauce, so don't worry). When you're happy with the consistency, add in most of your fresh coriander, the lime juice and most of the zest. Cook for another couple of minutes and then try the sauce and adjust whatever you need (if you need to) until you're happy with it. 

Serve with the rice, and the rest of the coconut, coriander and lime zest. You won't be disappointed.


Tuesday, 26 June 2012

Simply simple pasta sauce. With a moustache.


Okay I lied. It doesn't aaaaactualllyyy have a moustache.

I just said that to get your attention.

Why do I need your attention?

Because I'm about to show you the simplest, quickest, easiest and probably the cheapest pasta sauce you can possibly make. It takes ten minutes and it's perfect for when you  need a proper meal in ten minutes. 

For instance, I've been painting kitchen cabinets this week. I needed food. Fast. This fit the bill.


Cabinets. Mid-painting.
 But here's the sauce recipe. This makes enough for one serving but it'd be super simple to just double it.

What you need:

1/2 a can of tomatoes
1/2 an oxo cube
About two tablespoons of water
A dash of dried mixed herbs
Salt and pepper to taste

1. Start with your pasta. The sauce should take about the same time to cook as the pasta does. Which is pretty gosh darn convenient really.
2. Put the tomatoes in a pan over a low heat. I tend to use a relatively large one because the sauce tends to spit a little bit too much for a frying pan to be practical...
3. Add the half-oxo cube, about two table spoons of water and the dried mixed herbs.
4. Let it simmer, stirring occasionally so the sauce doesn't stick to the pan.
5. Season with salt and pepper.
6. When the pasta's done, take the sauce off the heat, tip the pasta into the pan and stir through.

And you're all done.

Wonderful.

Wednesday, 20 June 2012

Flatbreads and Bean Dip

My madre always complains that I don't eat enough beans. 
 
At the beginning of the year I turned up at uni with thousands of cans of beans and chickpeas and things and when it came to it, I think I used about two of them. Maybe she's right but I'm not usually a bean fan. 

BUT when it came to the end of term, I was using up whatever was around. And that just happened to be beans.

These flatbreads were super easy to make and delicious with bean dip.

AND here's how you do it:

For the flatbreads:
1 cup of flour (I used Dove's Farm gluten free bread flour but this will work with ordinary flour too)
1/2 a teaspoon of yeast powder
1/4 of a teaspoon of sugar,
1/4 of a teaspoon of salt
1/3 of a cup of warm water (add more water if the dough gets too stiff and more flour if it gets too sticky)

1. Mix together the flour, yeast, sugar and salt.
2. Gradually add the warm water, mixing with a wooden spoon. 
3. Knead the dough about ten times. 
4. Form into eight balls. Flatten each with a rolling pin.
5. Heat up a frying pan. You don't need to use oil or butter.
6. Dry fry the flatbread for about 2 minutes on each side, or until it looks done.

For the bean dip:

400g can of butter beans
3 cloves of garlic
a splash of lemon juice
2 tablespoons of olive oil
lots of mint leaves
salt and pepper to taste

1. Drain the butter beans.
2. Chop and crush the garlic. Add to the butter beans along with the olive oil and lemon juice.
3. Blend this all together into a paste with a blender.
4. Chop the mint leaves. Stir them into the dip along with salt and pepper. Serve with the flatbreads.


Green Pasta

I love pesto. Which is not surprising really, seeing as I love herbs and pesto is basically a herb sauce-thing with added pine nuts and cheese. What's not to love?

One day I will make my own pesto with my own herbs. For now I'm content with the Sacla variety (I really am a snob and am highly suspicious of Tesco's own brand), and to pesto lovers everywhere I present this recipe. I'm also going to add that when I came home in the Easter holidays I made it for my fussy sister and it's now one of her favourite things. Just saying.

For 2/3 people, you will need:
- a generous handful of pine nuts (depends how much you like them)
- a decent amount of french beans (ditto)
- 5/6 asparagus spears
- 1 large courgette
- Sacla 'classic basil' pesto. General rule = 1/4 of a jar per person.
- 75-100g tagliatelle per person
- parmesan, to serve (optional)


You can pretty much use any vegetables you like, so long as they're green. That's the rule. I don't usually bother with asparagus as it's so expensive and it's fine without it, but the last time I made this Jamie and I had gone to the street market in Staines and got two bunches of asparagus and 5 courgettes for £2.50. WIN.

1. Start by putting your pine nuts into a frying pan - no oil. Our uni hob takes forever to heat up and actually cook them so I tend to only start preparing vegetables once the nuts are already in, but if you have a gas hob (or a generally decent one) you should do the prep beforehand.

2. Wash and chop your beans (cut off the ends and then half) and do the same to the asparagus, only cut them into smaller bits and put the tips to one side. For the courgette, whap out your vegetable peeler and use it to make your courgette into courgette ribbons. This takes quite a while but is kind of fun and definitely worth it.


3. Once the pine nuts have begun to colour, add some olive oil to the pan and then toss in the beans and all but the tips of the asparagus. They take less time to cook, so they go in later on. Cook these for about 5 minutes, and then begin to add the courgette ribbons. The way I do this is to push the rest of the veg to the side and lay as many ribbons in the pan as I can fit in, like so:

Side note: Zosia and I found that if you let the ribbons cook for long enough they turn all crunchy and are awesome. Sadly they wouldn't really work crunchy here, but I recommend you try it some time all the same

4. Cook the ribbons for about a minute, then move them over to the side and add more. Make sure the pan has plenty of oil in, and that you keep moving around the veg that's being pushed to the side so it doesn't burn. Once about a third of the ribbons are in, add the asparagus tips. This is also usually a good time to put the pasta on, depending on how long yours takes to cook (the stuff I use says 7-9 minutes). If it's done too soon you can always put it aside and run it under the hot tap to warm it up!

5. Once all the ribbons are done, transfer the contents of the frying pan over to the saucepan you cooked the pasta in (once you've drained it, obviously) along with the pesto. Stir in. Dish up to fellow hungry students along with the parmesan. 

Side note #2: I know this is not tagliatelle. This is because I photographed Zosia's, and she has wheat free pasta and there was only penne. Sorry.
Done. I challenge you not to make 'mmmmmmm' sounds when you eat it.

Monday, 7 May 2012

Fajitas

These are very easy to make and immensely satisfying, and wonderful if you have friends over as Zosia and I did on Friday.

Fellow students, it's a win-win situation!

To make enough for four, you need:

- 1 large onion (or 2 small)
- 2 red chillies and seeds (depending on the type/your preference)
- 3 or 4 peppers
- 1 bag Quorn fillets or 'chicken style pieces'
- 1 sachet 'Old El Paso' fajita seasoning
- 1 tbsp cumin
- sprinkle of Tabasco
- squirt of lemon juice
- handful of fresh coriander


Chop your onion into long-ish strips and throw into a large frying pan or wok with a generous amount of olive oil. Then chop your chillies (the best way to do this is to make one cut from the stem to the bottom, and then slice into small pieces, cutting in the direction of the stem. This means you can hold onto the stem at all times, and so avoids getting chilli all over your hands and having to deal with the consequences of rubbing your eyes later in the evening). Add to pan.

Chop the peppers into strips - by the time this is done you can add them to the pan. Stir and take the opportunity to talk to your friends/esteemed dinner guests and food critics (depending on your chefy fantasies), as these need a good five minutes before you can move on.

The next step depends on what type of Quorn you're using - if it's the fillets, you'll need to defrost them in the microwave enough to chop them into small pieces. If it's the 'chicken style pieces' you can just throw them straight in the pan - they'll defrost in there as well as cook, and it makes life so much easier. Once they start to colour you can add the seasoning, cumin, Tabasco and lemon juice. You're now pretty much done - cook for about 10 minutes, stirring occasionally to make sure nothing catches at the bottom of the pan, and add your fresh coriander before serving.

Best served with corn tortilla wraps, grated cheddar cheese, sour cream, salsa, guacamole and Tabasco.

The delicate art of how to fill your fajita in order to successfully make it close

YUM. Tesco also just so happens to sell all the dips together in a 'Tex Mex' dips set, which is a brilliant money saver.


Word to the wise - do not expect to be able to eat them without making a mess. It's half the fun.

Enjoy!