Thursday 30 August 2012

Cooking bombardment: week at the boyfriend's

This last couple of weeks has been very hectic, as I've been flicking in between staying at home and with the boyfriend, and working in between. I'm sure every blog post I ever write begins with an apology and an explanation of hectic-ness, but there you have it!

There has been a lot of cooking though. So in this post I'm bombarding you with it. Although this isn't even a real post as I didn't write all the recipes, but you should trust my foody-judgement anyway. Hopefully. ENJOY.

Fraser made us THIS courgette pasta bake which was pretty awesome. We used creme fraiche instead of fromage frais (not gonna lie, that sounds weird) and if you don't have passata then generic chopped tomatoes would be fine. Also we ate half and then took the next half on a walk up a fell/down a valley/to an old slate mine the next day and ate it with a spork. Packed lunch FTW.


A couple of days later, I experimented with baked sweet potatoes. Which were awesome. Recipe as follows:
- 2 sweet potatoes
- bunch spring onions
- 2 cloves garlic
- handful of fresh herbs - preferably parsley and chives
- 4 tablespoons creme fraiche
- salt and pepper
- handful grated cheddar.

Scrub the potatoes, prick them in several places with a fork, place on a baking tray lined with tin foil and bake at 200°C for 45 minutes.

Meanwhile, use the last 10 minutes of the potato-baking-time to make your filling - chop the spring onions and garlic and lightly fry in a teensy bit of olive oil for 5 minutes. Then add the creme fraiche and the cheese and stir on a low heat for a few more minutes, so the cheese melts and you get a very lovely smelling, slightly messy-looking mixture.

Once the potatoes are cooked through, remove them from the oven, then scoop out most of the insides and put into the pan with the creme fraiche mixture. Mash it up a bit and make sure it's all stirred together, then add the herbs and season to taste, and put the mixture back into the potato skins. Add more grated cheese on top, because cheese is awesome.

Serve with something like salad or baked beans. Hungry as we were, we found that both together were a bit much.


Aaaand then yesterday we made a variation of THIS leek and parmesan risotto, which is stonkingly good and very very simple. We added a few more spring onions, some green beans (add a few minutes after the leeks and spring onions), some fresh parsley and a bit more cheese. And it was so very, very good. 

With it, I made baked asparagus, which is one of my favourite things in the world.

To recreate you will need:
- 1 pack/bunch of fine asparagus, or asparagus tips
- a couple of knobs of butter
- parmesan
- olive oil
- salt and pepper

Preheat the oven to 220°C. Chop the ends off the asparagus and give them a wash, then line them up in a baking dish. A non-metal one works best, but use whatever you have.

Place the knobs of butter over the asparagus. Tempting as it is to use loads I do try (despite often failing) to restrain myself, as it all melts and covers everything anyway. Next, grate enough parmesan over the asparagus to pretty much cover it. Season, drizzle with olive oil, and cook for around 20 minutes. BEST. THING. EVER.

Unfortunately I was so busy eating risotto and asparagus that I forgot to take pictures of them, but the risotto looked very similar to this and the asparagus should look like this.


It was a lovely, foody week. There was also apple pie, but I've decided that was so epic it gets its own post. So keep your eyes peeled folks.

Wednesday 29 August 2012

Yet another completely frivolous cake post


And here's the original pin...
 
 I completely blame Pinterest for this one. 

Even though mine looks a little gnarlier than the inspiration...

But there I was, pinning away as you do when I saw that picture. I showed the madre and she decided that maaaaybe that was a cake that should happen to our lives. 

So I decided that it would. 

Also when you give your little brother a fiver and ask him to go buy you malteasers and you expect him to come back with two, maybe three bags, you should revise your expectations. That resourceful child came back with five bags. I ended up using about four but STILL. Too many malteasers can be overwhelming okay. 


So to do this one, first off you gotta have a cake. Of course, I recommend chocolate cake. Specifically, Lorraine Pascale's "I Can't Believe You Made That Cake."

What you need:

Vegetable oil (to grease the tins)
200g of softened butter
200g of caster sugar
4 free range eggs
140g plain flour
60 grams of cocoa powder (I've used hot chocolate powder before for a sweeter cake)
Pinch of salt
2 teaspoons of baking powder

1. Preheat the oven to 180 degrees celcius and brush your cake tin with vegetable oil.
2. Cream together the butter and the sugar until they start to go pale.
3. Add two of the eggs and half of the flour. Mix well.
4. Add the other two eggs, the rest of the flour, the cocoa powder, the salt and the baking powder. Beat until the mixture is smooth. 
5. Spoon into the prepared tin, spread it out evenly then bake in the oven for 30=40 minutes, or until you can poke a fork into the middle and it comes out clean.
6. Leave to cool. (Always a really important instruction. Because if you don't, your cake will crack up and the icing will melt. Be patient...)


Now you gotta work on the malteasers bit. In the end I used about four big bags of Malteasers but at the end of the day it depends on the size of your cake. I'm gonna say its better to have too many than not enough, because then you can eat em.

(Also nope. Malteasers are sadly not gluten free. But I used them anyway. Because sometimes cake is worth breaking your usual rules for. I used gluten free flour and I only ate two slices. So s'all good)

ANYWAY. Buttercream:

190 g of softened butter
60 g of cream cheese (think Philadelphia.)
250 g of icing sugar
5 teaspoons of cocoa powder (add more if you taste it and think it needs more chocolate...)
 Cream together all the ingredients into buttercream. It is inevitable at this point that you will get icing sugar absolutely everywhere. That's just the way it is my friend.

Now take your cakes out of their tins and place on a plate. Spread the bottom one with a layer of buttercream. Place the second one top and spread with buttercream. It's important to create an even surface so your malteasers have something sensible to stick to so make sure you fill in the gap between the two halves of the cake properly.

Once all of the buttercream is on the cake, spread it out evenly across the whole cake, aiming to create a smooth, slightly domed surface on top.

Now it's malteaser tiiiime. Your aim is to create a line across the cake, from the bottom, across the surface and down the other side to the plate again. Place more lines on either side of this one until the cake is completely covered.

Push the malteasers into the buttercream ever-so-slightly, then place the cake into the fridge so it all sets solid and you're good to go.


Also I had this for breakfast Monday morning. Before having a very fun and dramatic asthma attack in hospital. Also now I'm on steroids. CHEST INFECTION FTW.
(This explains my lack of posting. Also the lack of savoury cooking because I'm too ill for that. Just cake.)

Monday 20 August 2012

Pizza Time


As well as being a crowd-pleaser, pizza is very easy to make and really doesn't take that long. You can even buy ready-made bases if you want, though I prefer to make the lot from scratch. For an extra 15 minutes of work it's more than worth it.

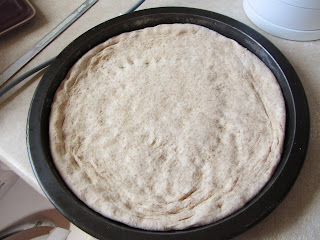
For the base, I stand by Delia's recipe which is scrumptious and has yet to go wrong for me. The quantities are also easy to adapt - for example, our round baking tray (you could use a rectangular one!) is 12" rather than 10", so instead of 6oz flour I used 9oz, and so on. Also, I used half white flour and half wholemeal, just to make it a bit healthier and less heavy.

I basically roll it out as much as possible, then put it in the middle of the tin and punch it into shape. Works for me.
For the tomato sauce, I adapted a recipe from 'The Vegetarian Student Cookbook' by Hamlyn, which is as follows:

- 3tbsp olive oil
- 2 red onions
- 2 cloves of garlic
- 2x 400g tins of chopped tomatoes
- 1 tsp red wine vinegar
- pinch of sugar
- generous sprinkle dried oregano
- salt and pepper

1. Heat the olive oil in a large saucepan. Chop the onions and garlic as finely or roughly as you like, and then add. Fry for a couple of minutes and then add the oregano, and any other herbs you fancy. Cook for another few minutes, until the onions are beginning to caramelise slightly.
2. Add the tomatoes, vinegar*, sugar and seasoning. Turn up the heat (or, if you have an annoying electric hob like we did in halls last year, have another ring already heated up so you can switch between the two) and simmer. You're looking to reduce it all by about half to get a good thick sauce.

*When I made this last, I used a glass of red wine and a splash of balsamic instead of the red wine vinegar, partially because that was all we had but also because I thought it would give it more depth. 

This recipe makes enough sauce for 4 hungry people and is more than enough for a pizza, so put any you don't use into a tupperware box and put in the fridge/freezer to have with some pasta at a later date. Two meals in one. You're welcome.

Now, toppings. You really can use anything you like. For mine I had red and yellow pepper (chopped and dry-fried for 5 minutes), fresh basil, whole cherry tomatoes, grated mozzarella, half a packet of soft goats cheese and lashings of green pesto. 

Tell me that doesn't make your mouth water. You're lying.

Bake at 230°C for about 30 minutes. It's hard to judge the time purely because it depends on how many toppings you use - the more toppings, the longer it'll take to cook. Keep an eye on it: when it's ready the crust should be golden, the tomatoes should be splitting and the cheese should be bubbling. 

Leave it on the tray to cool for a couple of minutes, then cut and serve up. We had it with a green salad, but potato wedges or cous cous would be scrumptious.

I'm admittedly not the best at slicing it up. But still, LOOK at it

Sunday 12 August 2012

What to do when you win a coconut

First of all, I'm sorry for being a bit MIA recently. Life is mad, especially since I got a job at my local fruit and veg shop (yay vegetables), but I will make it up to you. Starting with this.

Because at the Royal Holloway Summer Ball this year, I won a coconut on the coconut shy. Here is a picture of me with my coconut.

Zosia would like to add here that she really reallllly was very very excited.

I named him Tarzan. I was very very excited and full of ideas of what to do with it... but a month later it was still sitting on my shelf, though at home now as we'd left uni. And then my sister suggested I used it to make some sort of Thai curry. AN IDEA WAS BORN. And my coconut became this:


Which was pretty darn good really.

What you need for a Bryony-style Thai green curry:
- 1 coconut
- 8 spring onions
- 2 cloves garlic
- half a red pepper
- half an aubergine (a whole one would be fine)
- a thumb-size piece of ginger
- 2 chillies (I used 1 red and 1 green, but it's up to you)
- 6-8 new potatoes
- handful green beans
- handful mange tout
- 1 1/2 tsp soya sauce
- 1 tbsp soft dark brown sugar
- 350ml water with half a knorr stock pot or 1 oxo cube
- zest and juice of 1 lime
- fresh coriander
- jasmine or sticky rice, to serve

And the SECRET ingredient (less secret now I put it on the internet in capital letters) is a 'Thai Taste: Easy Thai Green Curry Kit'. Which sounds like a massive cheat, but actually it isn't and is also the best money-saver ever. It includes coconut milk, Thai green curry paste and herbs - which, if you bought them seperately, would come to about £5-6, and I think this was £2ish. So no complaints.

It's quite a lot of ingredients, but I promise nothing is lost and it's totally worth it. This amount served three, but it would be a good one for bulking up and cooking en-masse, too - especially if you get people to pitch in for cost.

1. Start by getting into your coconut. We used a hammer and chisel, but the internet is full of suggestions. Once you're in, cut the fleshy bits into small, thin pieces and dry-fry them in a wok or frying pan until they're toasted. This alone is amazingly nice. Put the coconut water aside, and put the toasted coconut pieces in a bowl to cool down. Meanwhile, put your new potatoes on to boil for about 15 minutes.


2. In the now-empty wok heat up some oil, and then add the spring onions, garlic and ginger. Stir-fry these for a couple of minutes, and then add the aubergine, followed shortly by the green beans.

3. Once the vegetables are starting to colour and the aubergine is beginning to shrink, add the pepper, chillis and Thai herbs. Stir-fry all this for another 5 minutes or so, before adding in the boiled new potatoes (chopped), the curry paste and most of the toasted coconut. Cook for another few minutes.

4. Next, add the mange tout, the coconut water (the stuff that was inside your coconut), the coconut milk, the water and the stock pot/cube. It should be beginning to look more like a curry. Turn up the heat slightly and stir, and add in the sugar and soya sauce. Now is also a good time to put your rice on to cook, though it depends what sort of rice you're using.

5. After 15 minutes or so, your liquid should have reduced by about half, and should now be thicker and more sauce-like (although it isn't a particularly thick sauce, so don't worry). When you're happy with the consistency, add in most of your fresh coriander, the lime juice and most of the zest. Cook for another couple of minutes and then try the sauce and adjust whatever you need (if you need to) until you're happy with it. 

Serve with the rice, and the rest of the coconut, coriander and lime zest. You won't be disappointed.


Monday 6 August 2012

How to levitate your cupcakes


Because everyone wants to levitate their cupcakes. Here's a picture of cupcake levitation in action:


Before you levitate em though, you gotta bake em. And here's how you bake my perfect cupcakes...

What you need for 12 cupcakes:

100g of butter
100g of sugar
100g of flour
2 eggs
3 tablespoons full of milk
A pinch of salt
1 teaspoon of vanilla extract
A splash of lemon juice
Cupcake cases

And here's what you do:

1. Preheat the oven to 200 degrees celcius.
2. Place the butter and the sugar in a bowl and cream them together. 
3. Add the eggs, the vanilla, the milk, the lemon juice and the salt. Whisk together until nice and light and airy. Taste a little bit; if it's not sweet enough for your tastes add a little bit more sugar but you don't really need to.
4. If you have one, put the cupcake cases into a muffin tin, and if you don't you can just lay them out on a baking tray. Distribute the cupcake mix evenly among them - about 2 to 3 teaspoons full of mix in each case.
5. Bake in the oven for about 12-15 minutes. When the tops are golden brown and a metal skewer/fork poked through the cake comes out clean, the cakes are ready. Leave them to cool.


When the cakes are cooled, you can add the icing.
 I used a simple butter cream (17g of unsalted butter whisked together with 280g of icing sugar) piped onto my cupcakes with a piping bag and a star shaped nozzle, but if you aint got one of them, just spread it on with a knife.
Finish off with generic sprinkles: I used stars and hundreds and thousands, as you do.


And the levitation bit? Meet my brand new, super nifty extendable fork from Tiger. Because who DOESN'T want one of them in their life???


Friday 3 August 2012

What I did whilst queuing for olympic tickets.


My dear darling little brother (who just happens to be about a foot taller than me now...) has set me the task of attempting to find and buy last minute Olympic tickets online. 

Having spent most of this morning queuing for things and getting more and more and more and more annoyed with LOCOG's silly website, I'm pretty sure it's not gonna happen.

But I've been cooking to fill the time and I made this super simple rocket and goats cheese pasta during one fifteen minute queue for athletics or synchronised swimming or something.
(Needless to say, I really didn't get those tickets....)

What you need for one serving:

Pasta (as much or as little as you want)
2 teaspoons of cream cheese
1/2 a pack of goats cheese (the spreadable type)
A splash of milk
6 Basil leaves
2 spring onions, chopped.
Three handfuls of rocket (although I have quite small hands. So maybe put in however much you fancy..)
Salt and Pepper to taste

And what you gotta do:

1. Cook your pasta. Hot water etc. You know what to do.
2. Put the cream cheese, the goats cheese and the milk into a small pan over a low heat. Let the cheese melt into a sauce like consistency. 
3. Chop the basil and add it to the pan, along with salt and pepper.
4. Keep the sauce cooking until the pasta is nearly done, for about ten minutes. If the sauce gets too thick or sticky, add a little extra milk.
5. When the pasta is nearly ready, add the rocket leaves to the sauce pan. Let them wilt a little bit then stir them into the sauce.
6. Drain the pasta and pour the sauce over it, mixing thoroughly to coat it. 
7. Serve with the spring onions sprinkled over the top. One lunch, ready to go.